How to Sharpen & Maintain Your Kebtek Electric Pruning Shears?
Apr 16,2026 | Kebtek Store
For professional landscapers and home gardeners alike, Kebtek electric pruning shears deliver consistent power, clean cuts, and less fatigue during long pruning jobs.
Like any high‑performance garden tool, their cutting efficiency, lifespan, and plant‑friendly performance depend entirely on regular sharpening, cleaning, and maintenance.
A dull, poorly maintained electric pruner crushes stems, strains the motor, wastes battery, and risks spreading disease between plants.
This step‑by‑step guide will walk you through safe sharpening, full maintenance, disinfection, battery care, and proper storage to keep your Kebtek electric pruning shears running like new for years.
Why Maintenance Matters for Electric Pruners
Electric pruning shears combine precision blades with a powered drive mechanism—so proper care protects both your plants and your tool investment:
- Healthier Plants: Sharp blades make clean, fast cuts that heal quickly; dull blades tear tissue and invite disease, pests, and decay.
- Longer Tool Life: Regular care reduces motor strain, prevents rust, and preserves gear and blade alignment.
- Better Efficiency: Sharp blades cut with less power draw, extending runtime per charge.
- Safer Use: Well‑maintained tools are more predictable and less likely to jam or slip.
Step 1: Safety First (Critical for Electric Tools)
Always perform these steps before any maintenance or sharpening:
- Turn off the tool and remove the battery pack completely.
- Wear cut‑resistant gloves to protect hands from sharp edges.
- Work in a well‑lit, stable area for clear visibility and control.
- Never perform maintenance near water or in wet conditions.
Quick Touch‑Up vs. Full Maintenance
| Type | When to Do It | Goal |
|---|---|---|
| Quick Touch‑Up | Every 2–3 hours of heavy use, or when you feel increased cutting resistance | Restore sharpness without full disassembly |
| Full Maintenance | At least once per season, or when blades are very dull, dirty, or sticky | Fully restore edge, clean mechanism, lube gears, check alignment |
Step 2: Pre‑Sharpen Cleaning & Inspection
Never sharpen a dirty blade—sap, resin, and dirt hide damage and ruin sharpening stones.
-
Remove DebrisBrush off dirt, wood chips, and dried sap with a stiff brush. Use a biodegradable resin remover for sticky buildup. Wipe with a clean, dry cloth.
-
Inspect Key Components
- Blade condition: Look for nicks, cracks, or excessive wear. Replace badly damaged blades instead of sharpening.
- Blade alignment: Upper and lower blades should meet cleanly without gaps or side play.
- Drive mechanism: Check for unusual play or grinding in the gear head.
- Fasteners: Tighten any loose screws on the housing and blade assembly.
-
Remove Surface RustUse fine steel wool or a rust eraser to gently remove light surface rust. Wipe clean afterward.
Step 3: Professional Sharpening for Kebtek Electric Blades
Kebtek electric pruners use precision‑ground bypass blades. Sharpen only the beveled cutting side—do not regrind the flat back except to remove burrs.
What You Need
- Kebtek double-sided sharpening whetstone (best for heavy dullness)
- Fine ceramic or natural stone (for honing)
- Lubricating oil or water for the stone
Sharpening Steps
- If needed, remove the blade assembly following your Kebtek user manual.
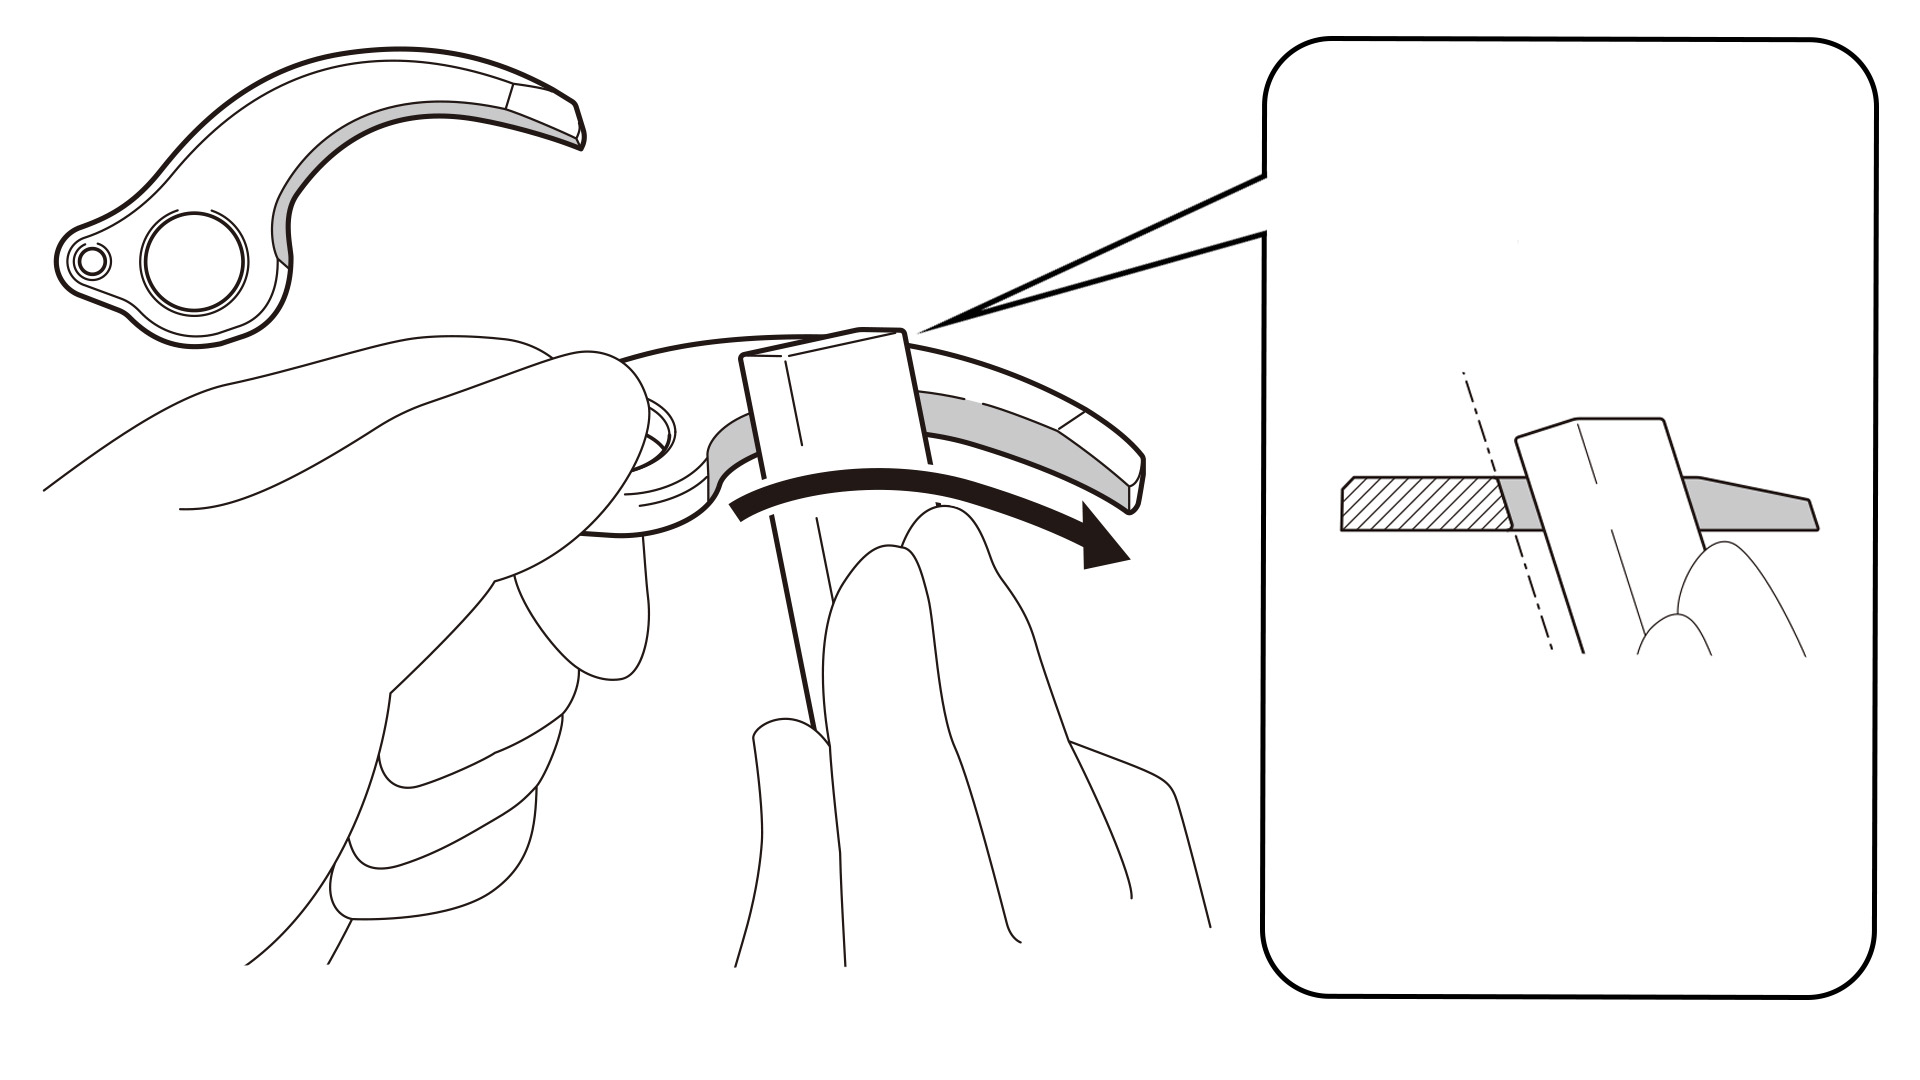
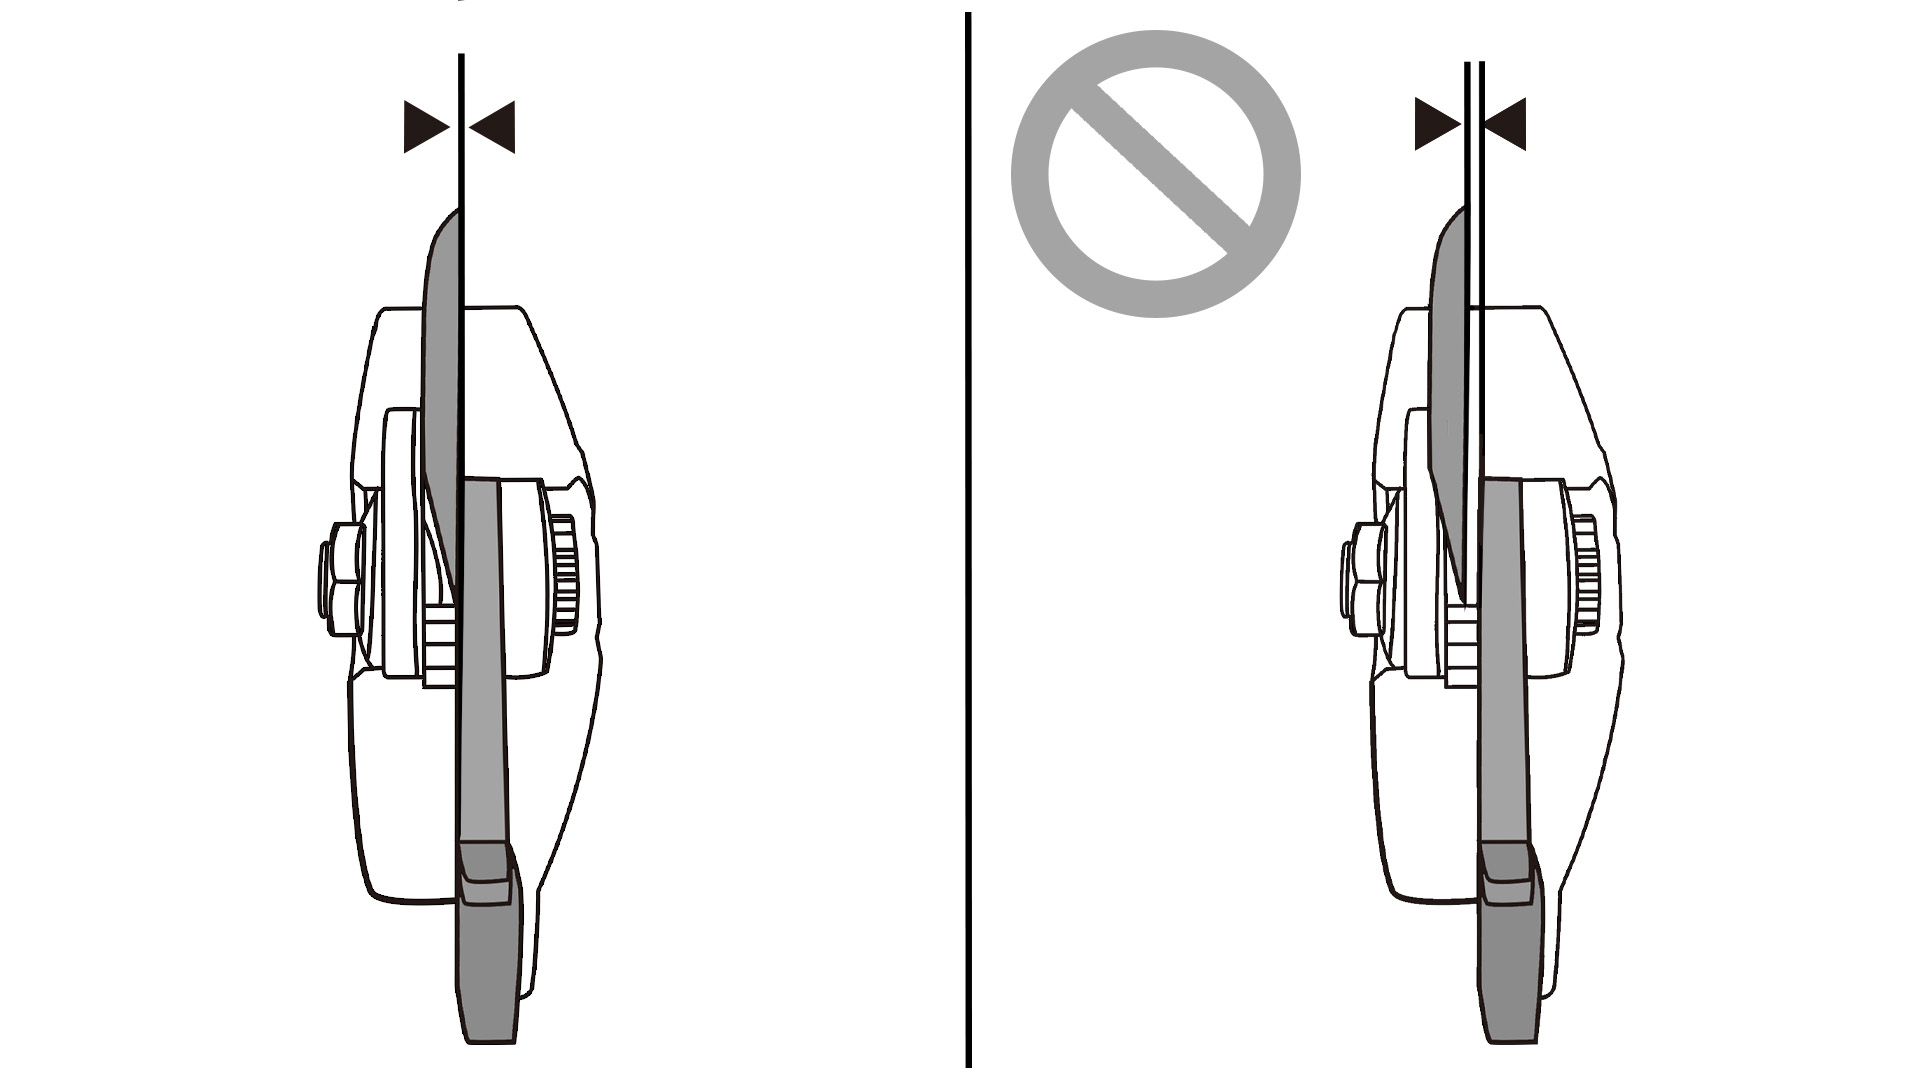
- Match the factory bevel angle (approximately 23°–25°). Hold the stone flat against the bevel.
- Sharpen with smooth, one‑direction strokes from heel to tip. Do not scrub back and forth.
- Use consistent light pressure. Repeat 5–10 strokes until a uniform sharp edge forms.
- Deburr the flat side: Lay the stone flat against the back of the blade and make one light stroke toward the tip to remove the wire edge. Do not create a new bevel.
- Wipe the blade completely clean and dry.
Pro Tips
- For very dull or nicked blades: Start with a coarse diamond stone, then finish with a fine stone.
- Maintain the original blade curve—do not reshape the edge.
- If blades are cracked, chipped, or too thin, replace them to preserve cutting performance and safety.
Step 4: Lubrication, Reassembly & Gear Care
Electric pruners have moving gears and a drive mechanism that need proper lubrication:
- Lubricate: Apply a small amount of Kebtek recommended tool oil or food‑safe machine oil to the blade pivot, gear head, and sliding components.
- Reassemble: Carefully reattach blades and housing; align parts correctly.
- Adjust Tension: Tighten the pivot or blade screw until blades move smoothly without side play. They should close cleanly without grinding.
- Protect Blades: Lightly oil exposed metal surfaces to prevent corrosion.
Test the action: The blades should open and close smoothly with the motor off.


Step 5: Disinfection to Stop Plant Disease
Pathogens spread easily on contaminated blades. Disinfect routinely:
- Clean blades first to remove sap and dirt.
- Use 70% isopropyl alcohol (fast‑drying, non‑corrosive) or diluted household bleach (1:9 ratio).
- Wipe all cutting surfaces fully and let dry completely.
- Reapply a light coat of oil after disinfecting.
When to disinfect:
- After cutting diseased branches
- Between different plants
- At the end of each work session
Step 6: Battery Care & Long‑Term Storage
Battery health is critical for electric pruning shears:
- After use: Wipe blades clean, apply a light oil coating, remove the battery, and store in a cool, dry place.
- Long‑term storage:
- Fully charge the battery before storing.
- Store battery separately from the tool in a dry, temperature‑stable area.
- Charge the battery at least every 3 months to avoid deep discharge damage.
- Store tool: Hang in a dry, dust‑free environment; avoid direct sunlight and moisture.
Daily After‑Use Routine (30–60 Seconds)
Make this habit to keep your Kebtek pruner ready:
- Wipe blades clean of sap and debris.
- Quick hone with 2–3 light strokes on a fine stone.
- One drop of oil on the pivot.
- Remove battery and store properly.
Final Thoughts
Your Kebtek electric pruning shears are built to deliver professional performance season after season—when you take care of them. Regular sharpening and maintenance keep cuts clean, plants healthy, and your tool running efficiently. A few minutes of care after each use turns a quality tool into a lifelong gardening partner.
Explore Kebtek’s official replacement blades, sharpening tools, and maintenance accessories to keep your electric pruners in peak condition.
FAQs
Do I sharpen both sides of the blade?
No. Only sharpen the beveled side. The flat back is only lightly stroked once to remove burrs.
How often should I sharpen my electric pruner?
Quick touch‑ups during heavy use; full sharpening at least once per season or when cuts become ragged.
What angle should I sharpen at?
Match the factory bevel (≈23°–25°). Do not force a new angle.
Can I wash my electric pruner with water?
No. Do not submerge or rinse with water. Wipe clean with a dry or slightly damp cloth.
When should I replace blades instead of sharpening?
Replace blades that are cracked, deeply nicked, worn thin, or no longer hold an edge.